So, next in the sequence of my playtests of the 'new' WRG 1925-50 set is another scenario from the 'Ghosts of Smolensk' scenario book. This time 7th Panzer Div has siezed a bridgehead over a river at the small town of Senno on the outskirts of Smolensk, and 7th Mechanised Corps has decided it wants it back.
This time there will be some tanks and AT guns in the mix.
The base scenario is played on a small 3x4 table. I've stretched it to 3x5 to give the Russians a bit more room to set up. I was going to switch to 1mm = 1m, but given it is small table scenario anyway, I'll stick with 6"=100m.
Main features are the stream running N-S and the road running E-W, straddled by various buildings which make up Senno. There are a few boggy fields east of Senno, and boggy woodland. I'm treating this as impassable for vehicles. In the base scenario it is marshland, but the woods give the Russian infantry more of a chance. The hedges are high vegetation, they block LOS at ground level, otherwise there isn't a good deal of LOS blocking terrain here. The steam is passable but is a linear obstacle.
The Russians need to take and hold four buildings (ie all the buildings on the east side of the stream will do), and the Germans need to stop them.
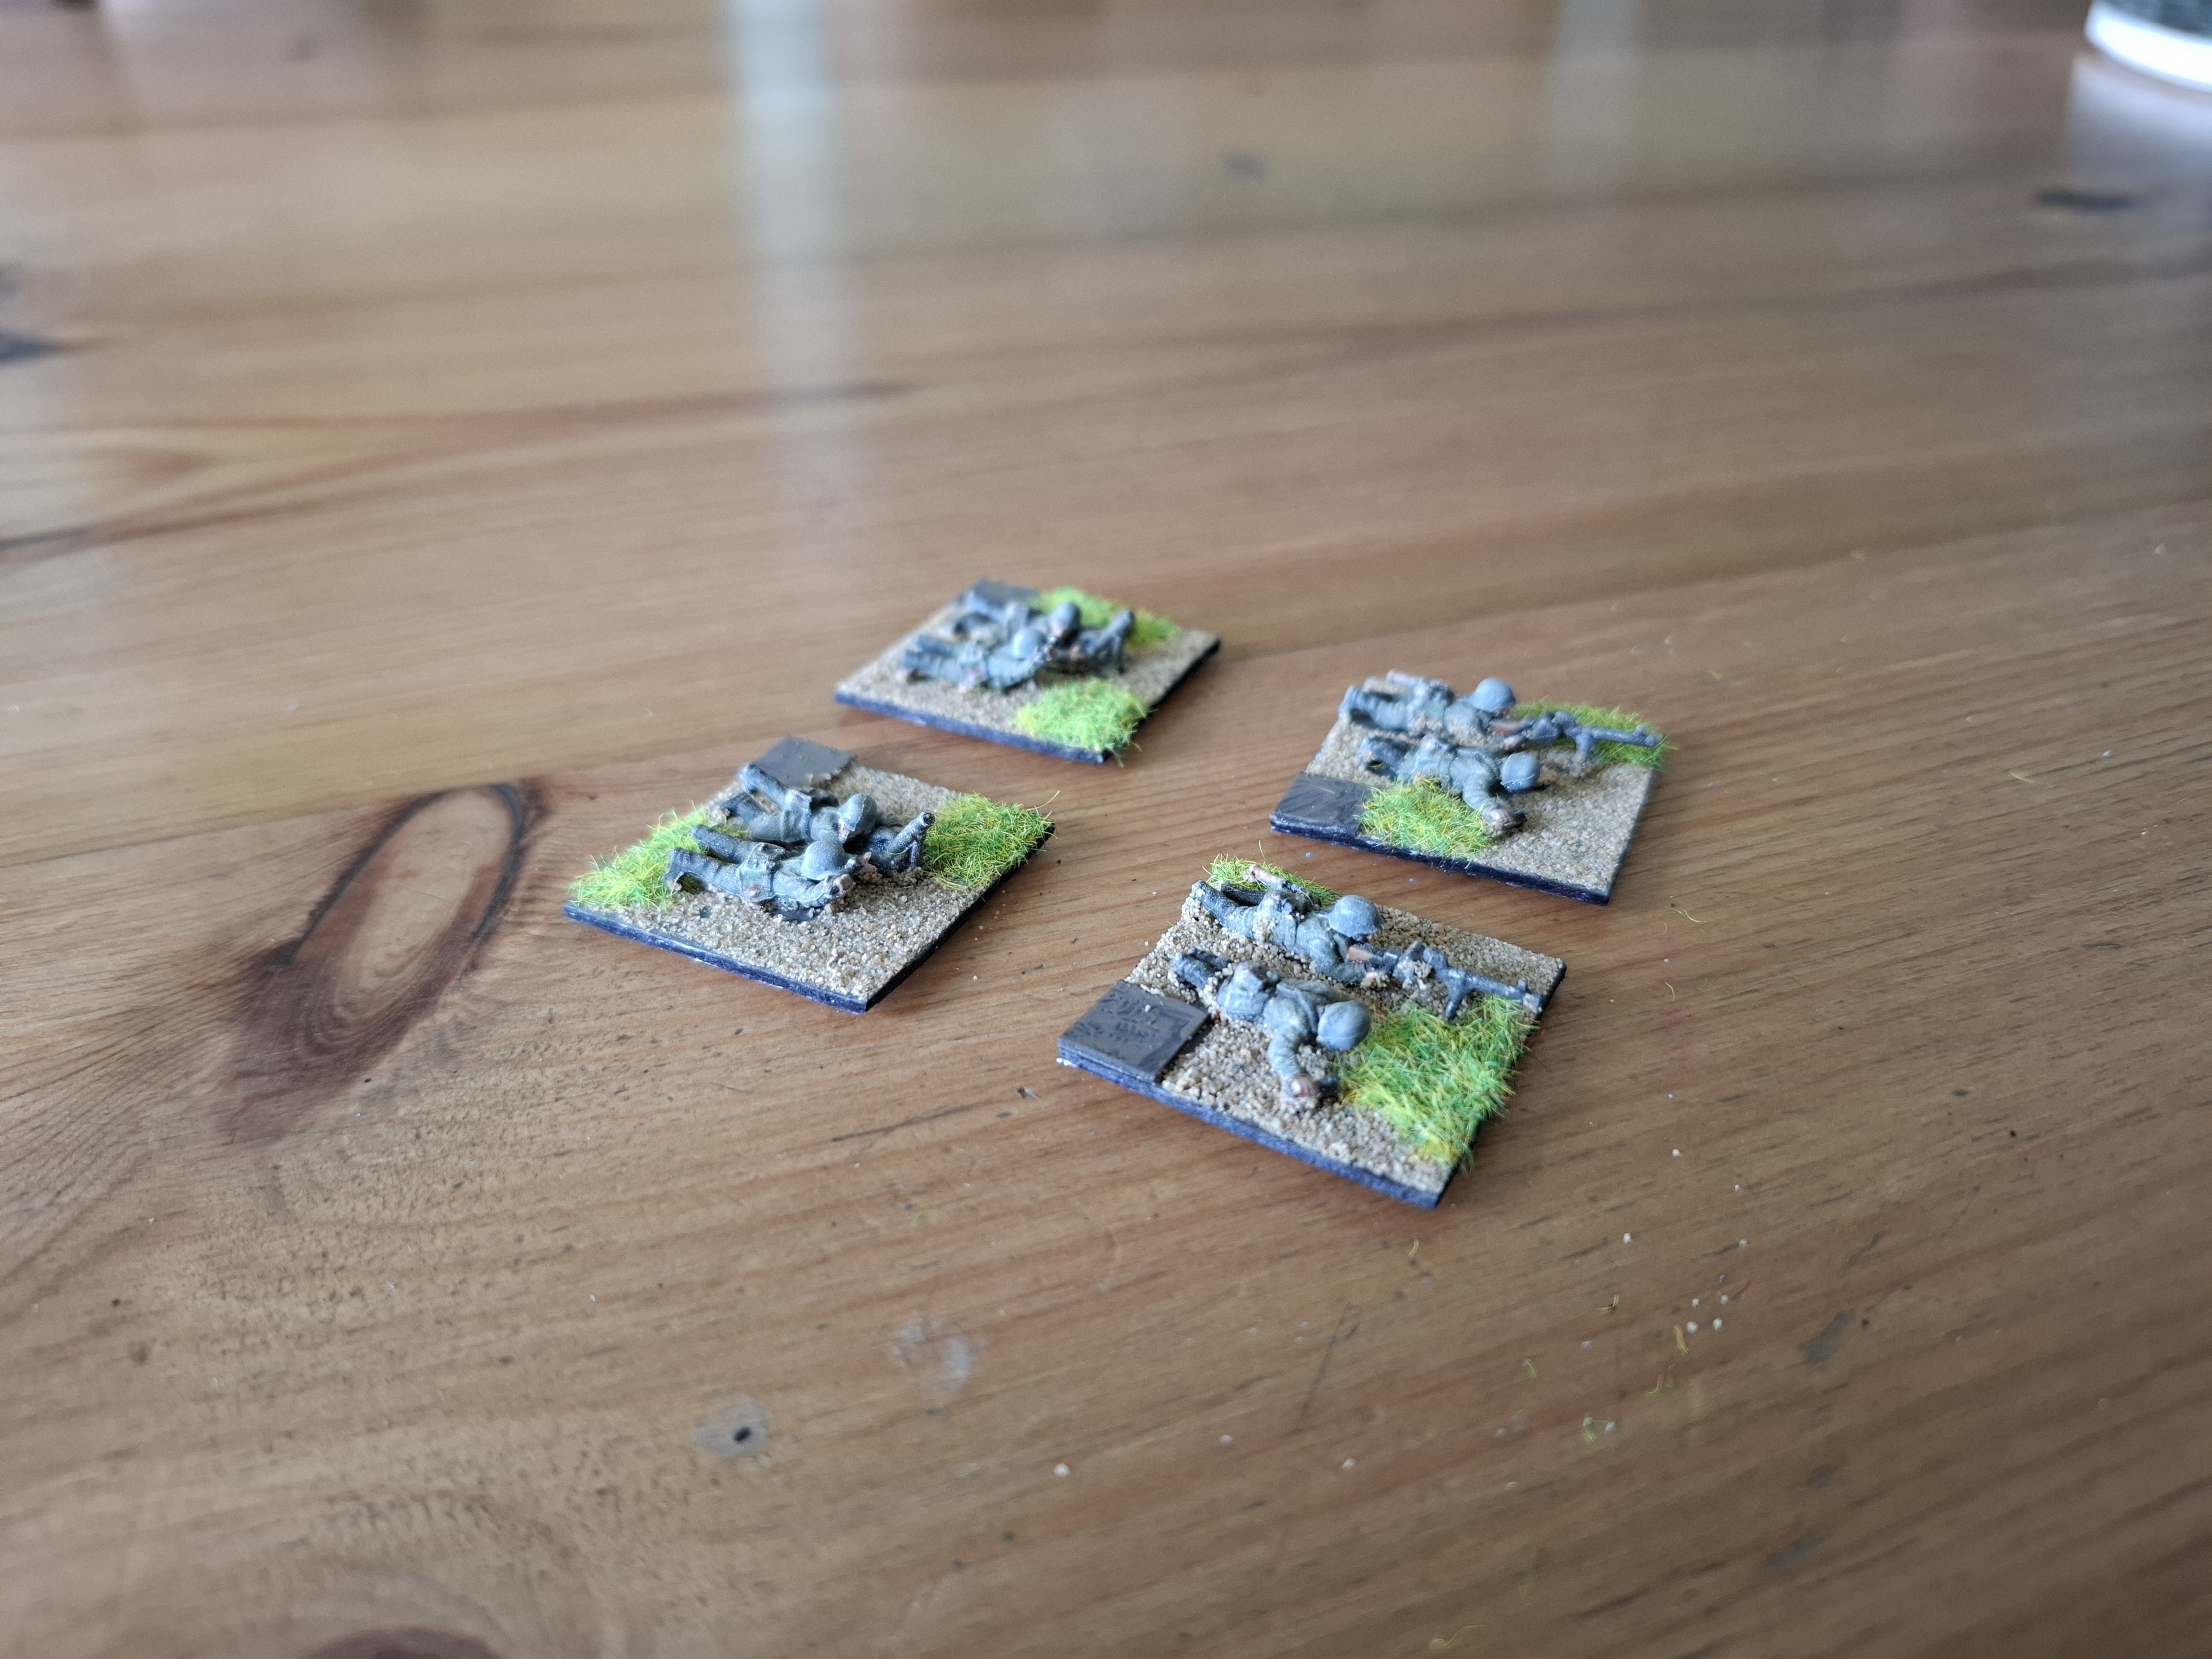
The initial German force is a (dismounted) motorised infantry platoon supported by a 75mm LeIG towed by a halftrack. I've gone with a slightly different organisation for the Grenadiers than the last game, three squads each with an MG34 group and a rifle group, a rifle/cmd HQ with a manpack radio plus a 50mm mortar section and AT rifle group attached from company.
There is also a company command element with a Kubelwagen which includes a radio.
Riding to the rescue is another motorised infantry platoon with the same TOE as the dismounted one, but with their transport. Whether they will be brave enough to drive their trucks into load of Russian tanks is another matter.
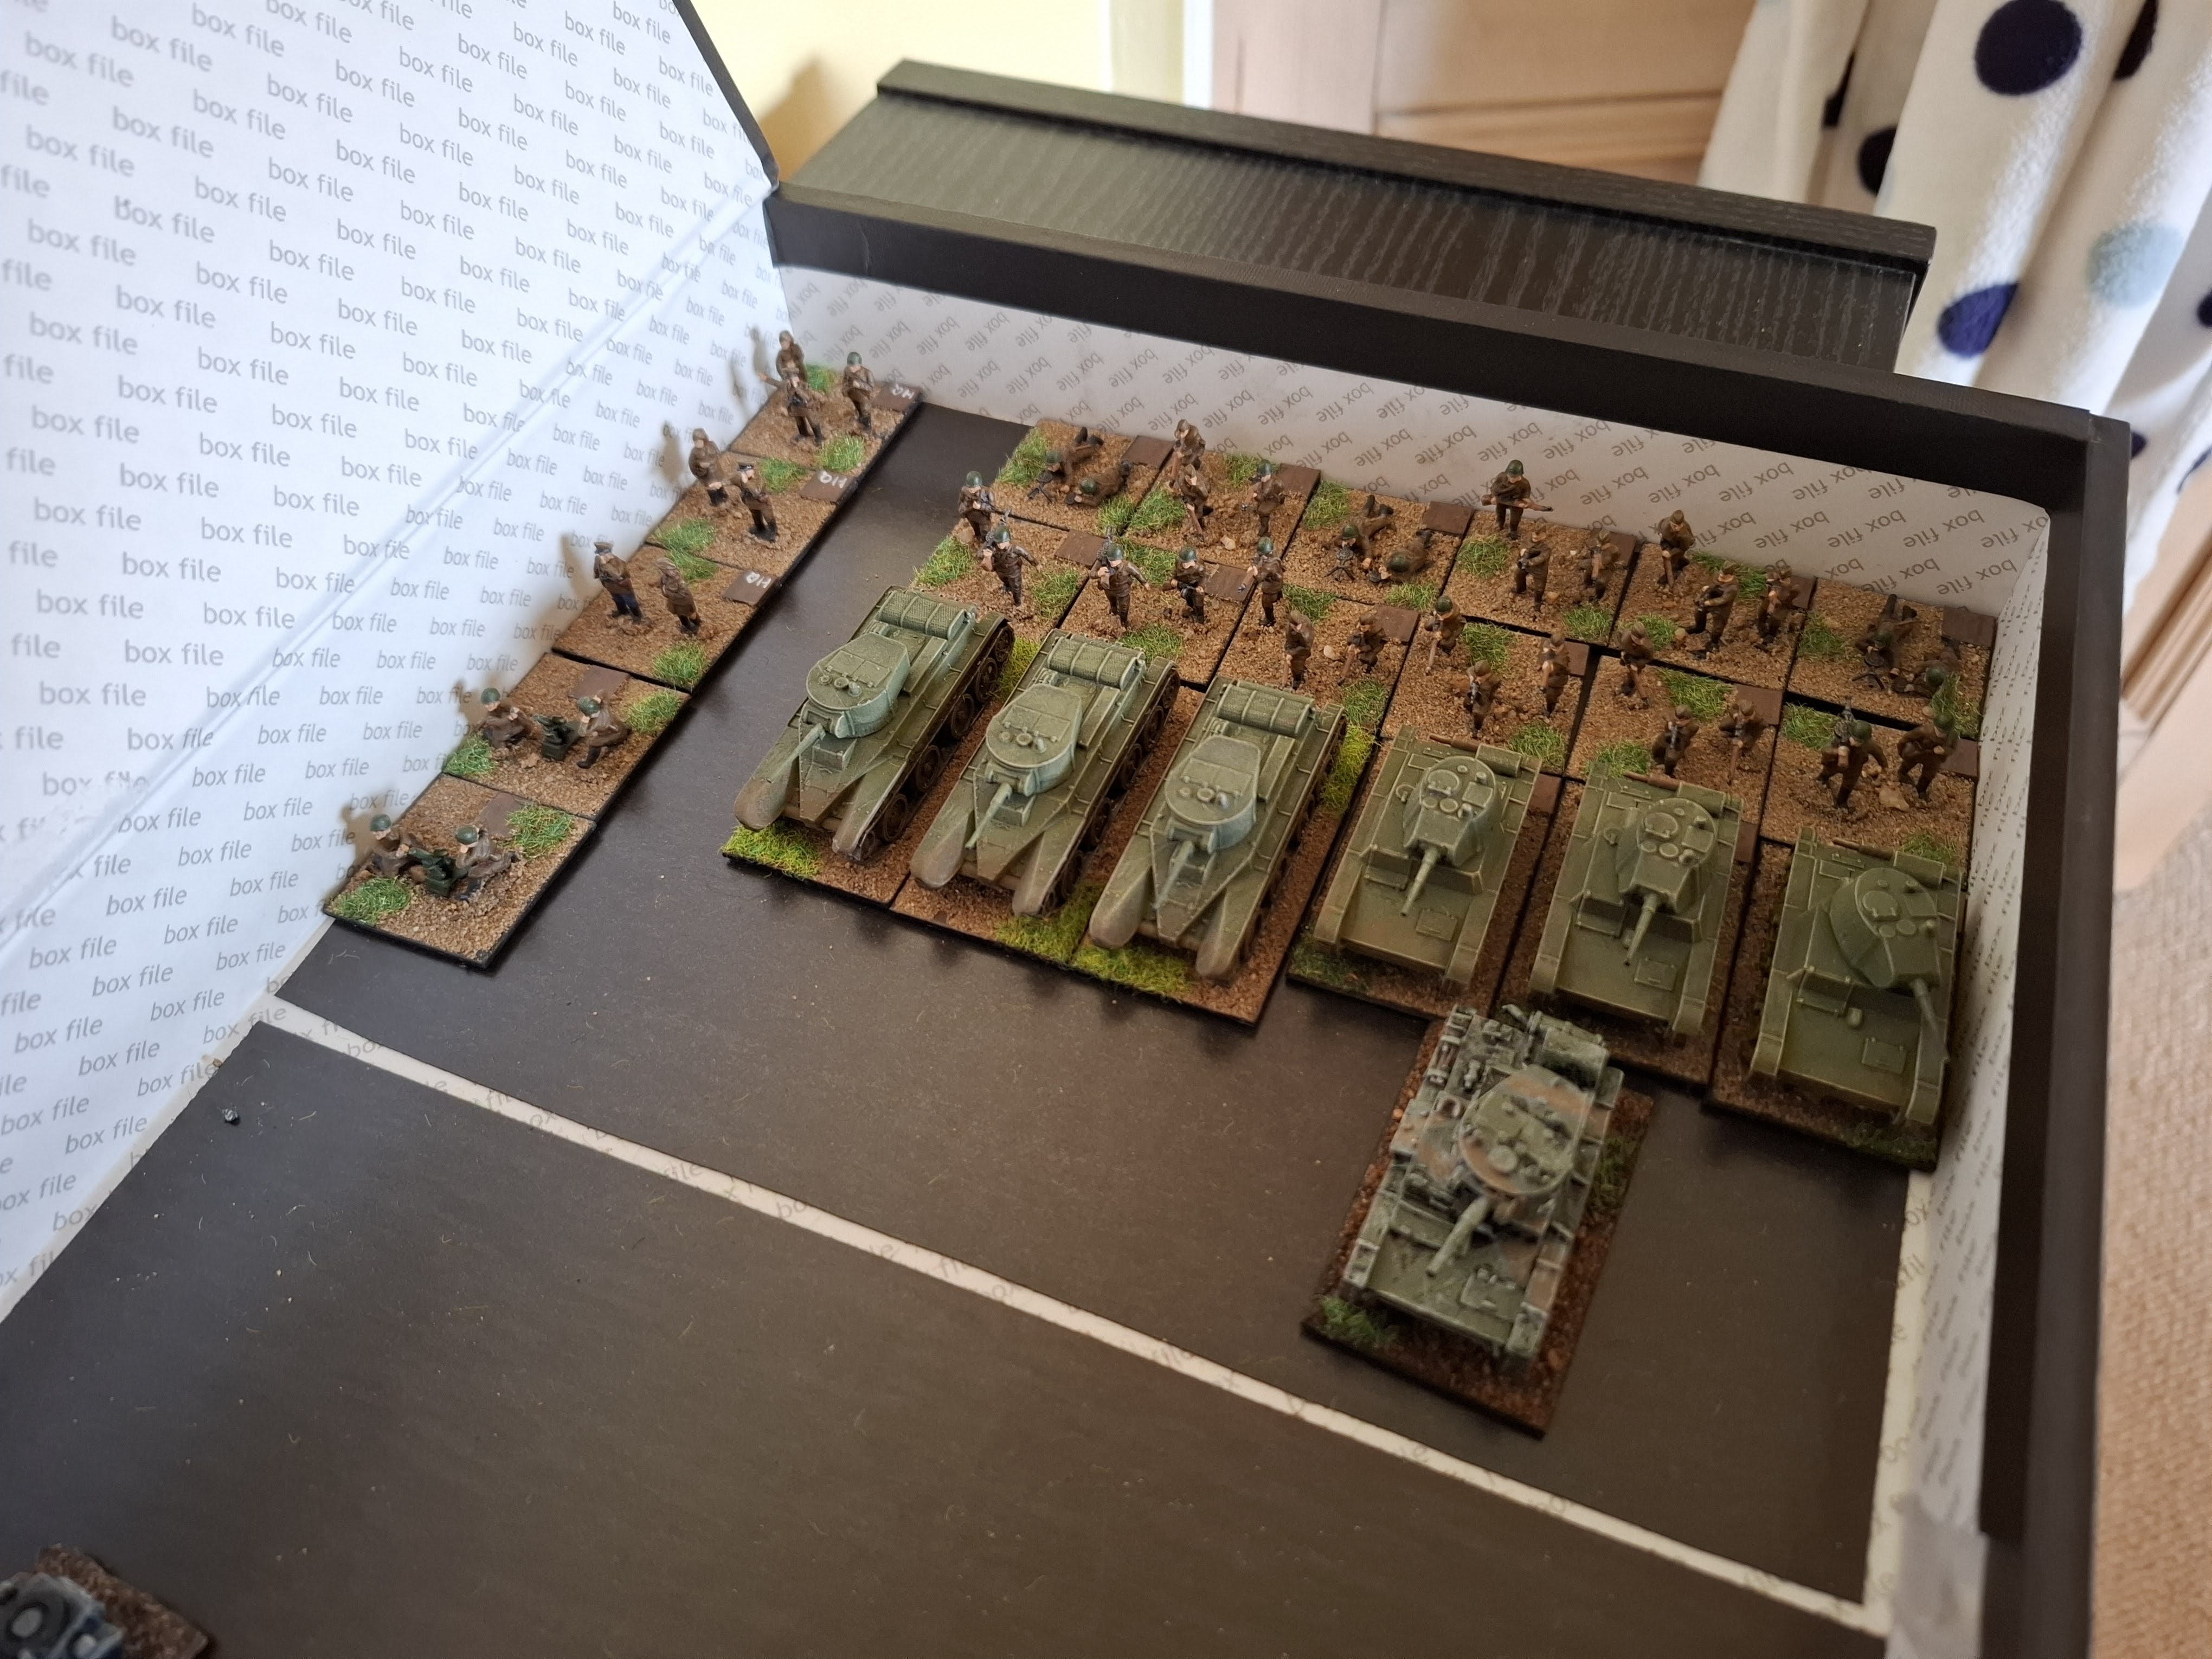
Attacking them are bits of 7th Mechanised Corps. Amazingly the Russians seem to have brought some infantry along with their tanks. The Russians have a platoon each of BT7 and T26s (although they are all supposed to be BTs, this is what I have). I've been generous and given them a company command T26 too. None of these vehicles have radios, and given the operational rate of 1941 Soviet pre-war armour, this lot is probably all that is left of an entire battalion. The BTs come on first, followed a few turns later by the T26s.
They also have two platoons of motorised infantry. The base scenario gives them trucks, but given the terrain, that is just suicide, so these guys are walking. Very few Motorised Regiments in 1941 had any trucks anyway. I've been a bit generous with these two, they each have an HQ and three squads with a rifle group and rifle/LMG group each. There is also a company commander on foot, plus a 50mm mortar section with two mortars. None of these guys have any radios either.

There is a fair amount of turf to cover for one platoon, but a 600m front should be quite doable given the open terrain. The platoon deploys in an inverse wedge with two squads up front (you can see 1 gruppe in the woods on the left and 2 gruppe in the fields in the foreground). The AT rifle is attached to 2 gruppe and both the AT rifle and MG34s can cover the open ground. The rifle groups are providing flank protection for the MGs. There are pre-arranged flare signals for each to group to pull back if required as they are miles from platoon HQ.
The Luftwaffe has already spotted the Russian tanks, so the Germans know they need to lay out an AT defence.
3 gruppe and platoon HQ are hiding behind buildings in the town. Being inside buildings is a really bad idea as they can be acquired from miles away and the occupants then suppressed, or worse. Hiding behind them though gives bonuses against acquisition. In the last game the German halftrack was almost constantly suppressed by small arms fire which rendered it fairly useless, I'm hoping to do the same to the Russians in this game.
Company HQ is on the far side of the stream.
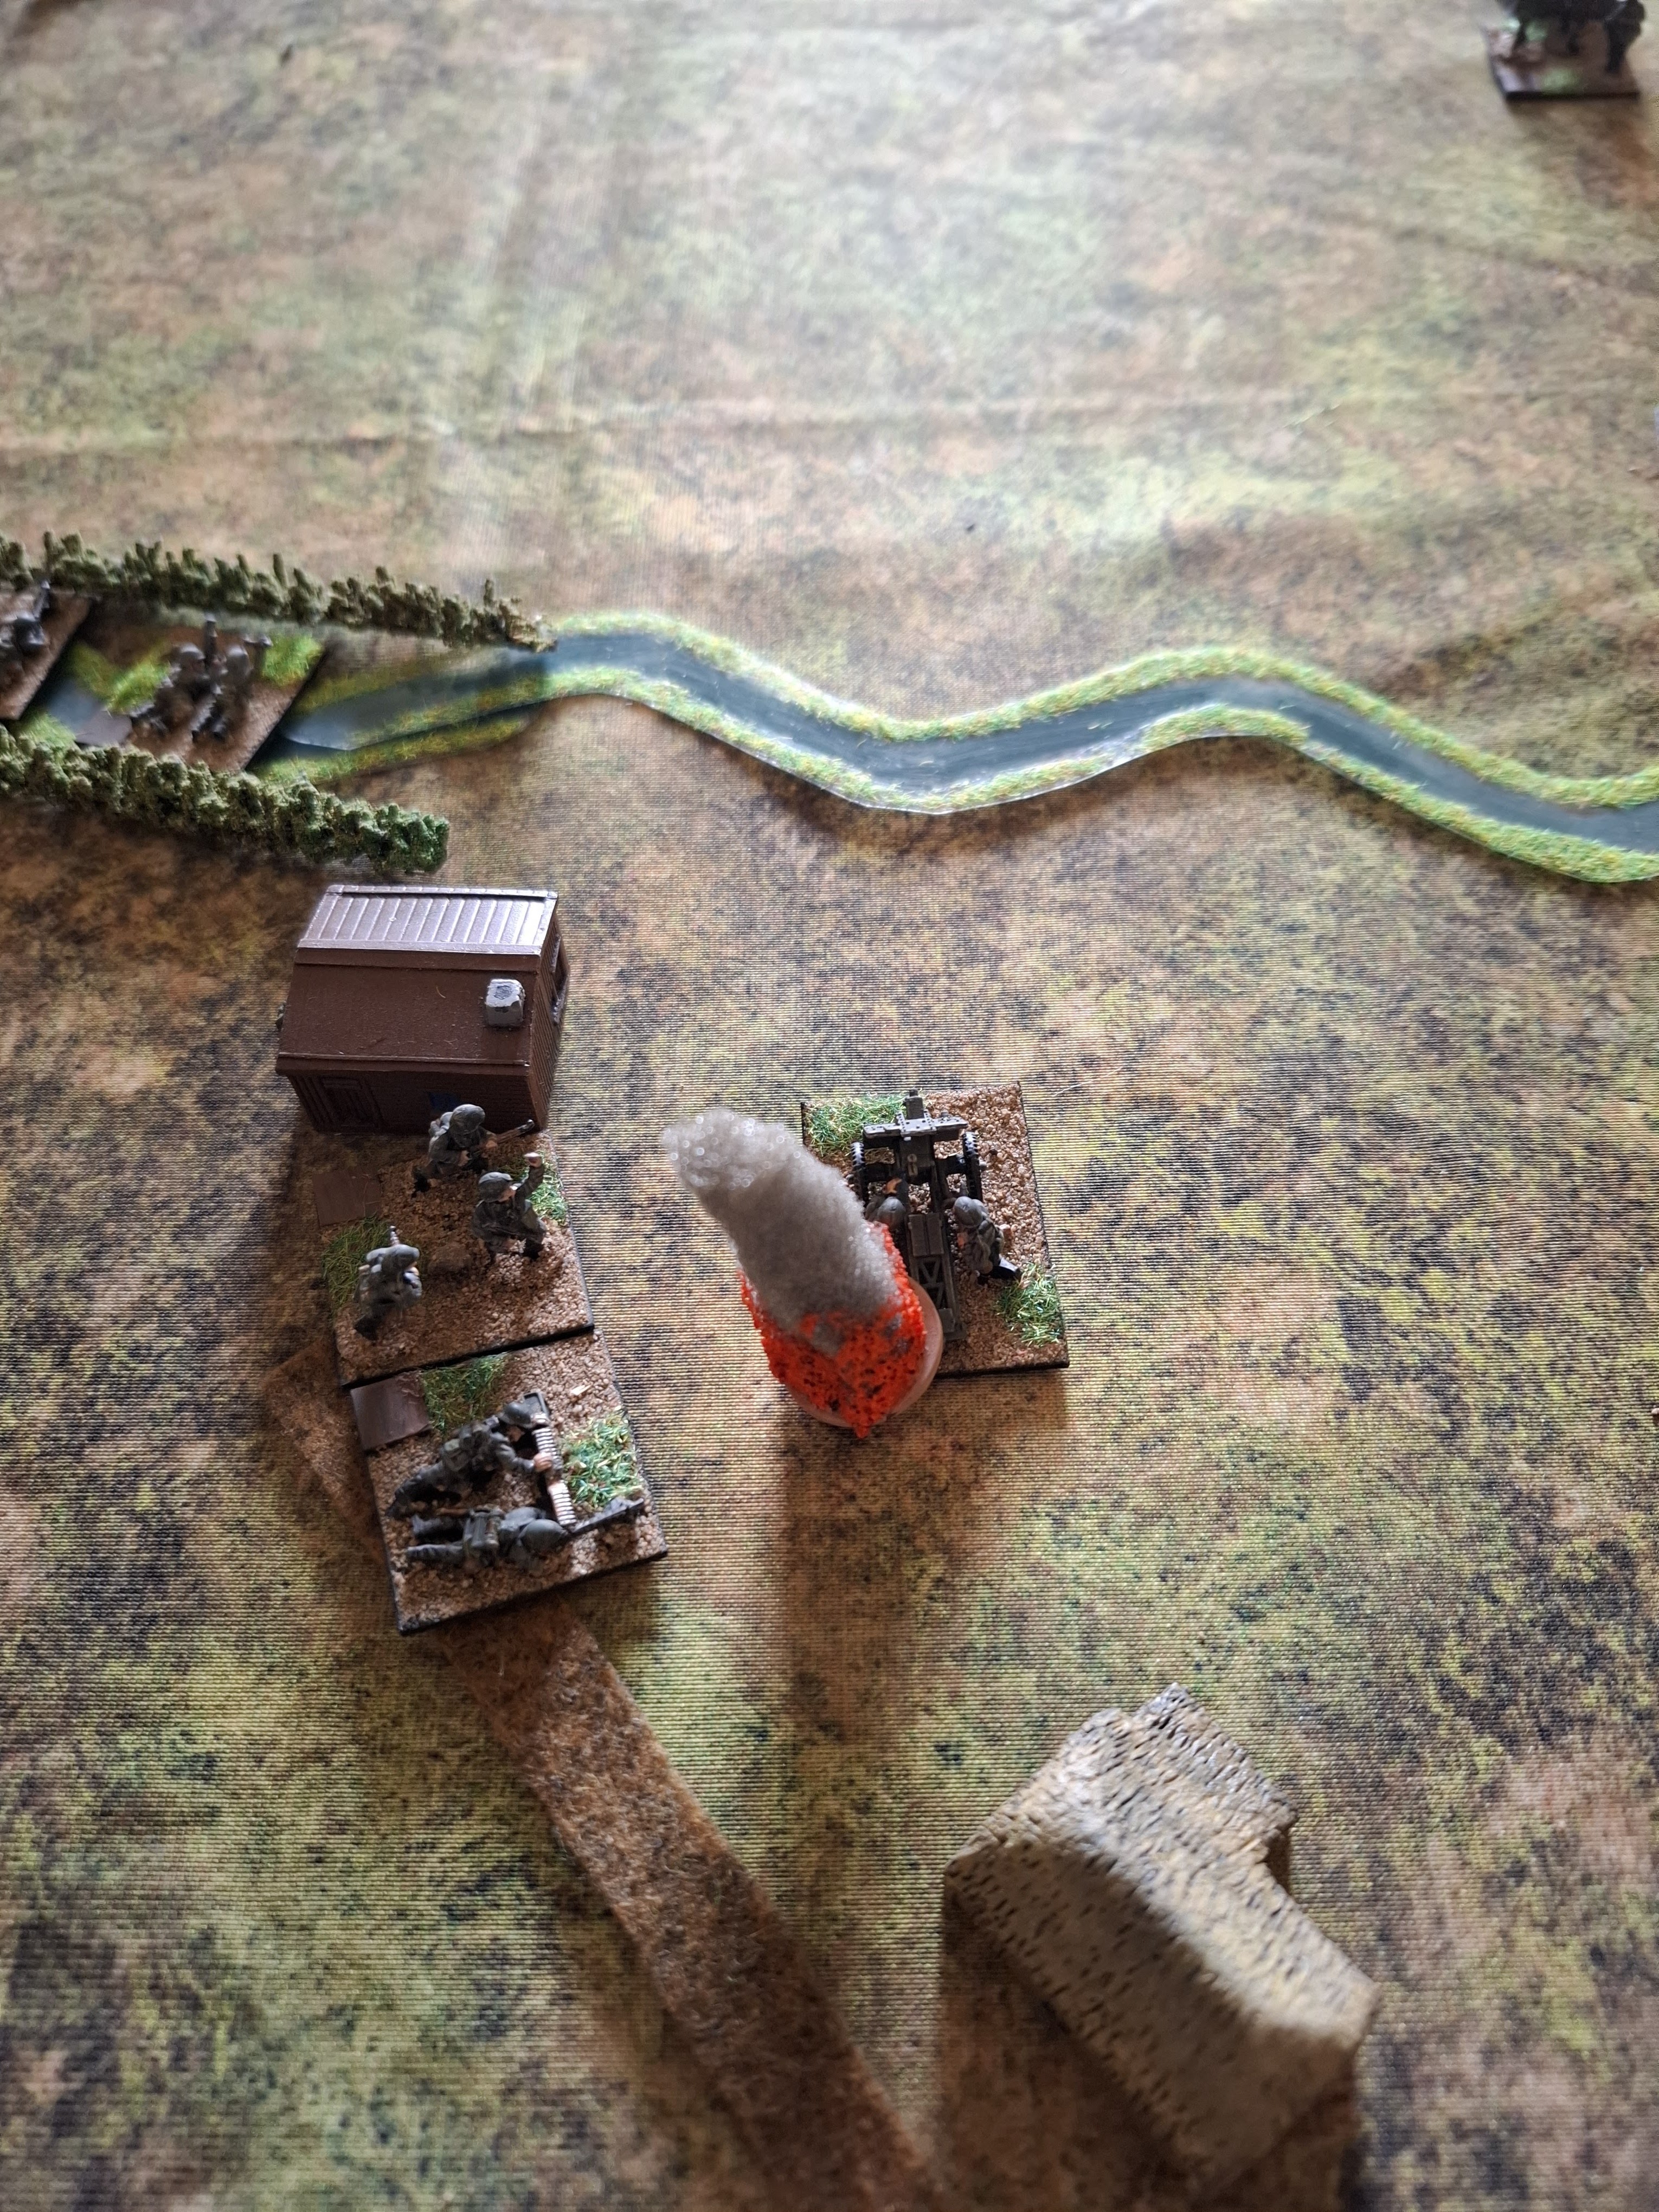
Over near the hedged stream is the 75mm infantry gun, again hiding behind a building. It has a decent field of fire across the open ground. Actually in the stream and behind the hedge is the 50mm mortar team, again with a wide field of fire. Fortunately the Russian tanks can't move through the woods, but the Russian infantry certainly can so we will see how this pans out.
My initial plan is to bring the reserve motorised platoon on here as they can debus safely behind the hedegrow, but I'll need to see how the Russian attack goes.
The Russians don't have any radios so their attack is going to be entirely pre-planned. The two CC elements can intervene I guess but as neither company has any significant reserves, I'm not sure what they can usefully do.
The main thing I'm going to aim to do is keep the armour and infantry in step so they can support each other. The Russian tanks will suffer big reaction penalties if they end up in the buildings without support. So the tanks will just roll down the open ground in the middle towards the village, shooting at stuff as it appears. BTs on the left and T26s on the right (I rearranged them into the correct formation after this photo!).
I'm putting in the stronger infantry attack on the right. One platoon plus the CC and mortar section. There is more frontage to deploy here and a covered route via the hedges right up to the village. The mortars are going to set up in the tree line to provide covering fire. For now the infantry are advancing in squad columns, rifle groups at the front.
The other platoon is on the left. As this section of woods is so narrow, they are just advancing on a two squad front. The playable area stops 12" from the left. They will push down the woods and clear the fields area before entering the village.
And off we go. The first wave of tanks keeps pace with the Russian infantry as they march through the woods, so everyone is rumbling forwards at 100m (6") per turn.
The distances are long and all the infantry are in cover so spotting them is very hard. The Russian tanks are pretty easy to see however and the German 50mm mortar, ATR, 75mm and the rifle and MG groups in the village easily acquire them.
An eagle eyed MG34 team in the northern woods spots some Russian infantry moving along the tree line on the opposite side of the clearing and guns them down. The reaction test results in the inevitable 'cautious advance' ie max half move, which I was going to do anyway.
The Russian infantry on the other side are shielded by the hedgerow and the woods are wider anyway so they press on quickly. The Russian 50mm mortars take up position along the woods line to fire across the clearing.
The BTs advance to within 100m of the German 2nd squad to force a morale check, and...disaster! Every single one is blown up! The ATR got one, it was fairly easy to score a hit at 150m range but it needed to roll a six to KO, which it duly did. The new penetration table gives the maximum range you can penetrate an armour class (250m for an ATR vs Class II) at which range you need a six, -1 for every 250m closer down to a minimum score required, which is still a six for an ATR as the rounds are so small and non lethal. So a roughly 10% chance of a kill, as the ATR can only fire once in a turn.
The 75mm duly hit one BT, despite it being 550m away (needed a 4+ to hit with a 75L24, - 1 for first shot vs a acquired target to 5+). The penetration for 75L24 vs Class II armour is 2000m, so needed a 6-5, or 1+. So the tank brewed.
Stationary guns get to fire twice, and it duly acquired the last BT, scored another hit on 5 and up it went. The odds of that full sequence of rolls was around 1:120.
I didn't want to screw up the playtest with a freak range of rolls, so I resolved it again. This time the 75mm killed one tank but amazingly the ATR managed to roll another six on its penetration roll. The dice gods had spoken and I let the result stand. The tanks duly failed their morale and got a big yellow badge of courage, but as they had completely failed to spot anything, just sat there and didn't withdraw.
The only bright spot for the Russians was that one of their 50mm mortars had spotted the ATR.
Over in the right, the Russian infantry shook out into skirmish line, being careful to stay more than 100m away from the Germans in the wood, while the 50mm mortar stonked the ATR, missing completely.
And on the left the Russian infantry also spread out and tried to spot the Germans lurking in the corn fields, but none managed it as none of the enemy had fired.
Despite surviving one round of fire, the last (stalled) BT was duly acquired, hit and destroyed by the 75mm gun on the following turn.
I took a break for the evening and had a long think. I seriously thought about packing it in after the tank disaster, as I couldn't imagine how exactly the same fate wouldn't occur to the T26s. But then I had a longer look at the provisions for suppressive fire, and realised that of course you don't actually need to see the enemy to fire at them....
Next morning I started up again. The next wave of Russian tanks rolled cautiously on. The Russian platoon near the fields sprayed the edge of the field with suppressive fire, which suppressed one of the German groups and they both pulled back into the field so they were no longer a permitted target.
The ATR had also ducked behind the barn to lose the 50mm mortar acquisition.
I must have missed a photo here - but basically the Russians stormed forward in the woods and bizarrely managed to suppress the German before they could fire back. The action sequence allows a rifle group to move forward and then fire 'on the move'. As they were now within grenade range, this was extremely lethal (hits kill on anything but a 1!) and both German groups were very lucky to escape with suppressions, and they fell back out of range.
I can't actually think what I could have done to avoid this, possibly pulled back when the Germans fluffed their spotting rolls the previous turn. It is possible I made a mistake in measuring the distances for spotting, movement and firing. Something it is very easy for Mr Fat fingers to do, even with 15mm stuff.
One bright light for the Germans was that their motorised platoon had arrived, and it has a nice covered position to debus in. The truck parked up behind the hedge to debus next turn.
Sadly in the fields, the Russians were close enough to spot the retreating German infantry and they were both cut down by MG fire as they moved through the corn.
The Russian mortars meanwhile acquired the barn instead of the ATR hiding behind it and stonked it with suppressive fire - which caught the ATR in its beaten zone. Mmmm. Not so good for the Germans.
Sadly for the Germans retreating in the woods, units are allowed to fire (once) at them in their original positions, so the two leading Russian sections laid down a hail of MG fire and grenades, and cut them both down. The reserve section advanced over the corpses.
The German infantry now debussed behind the hedge. The T26s had also discovered the suppressive fire trick, and concentrated all their fire on the building the 75mm was hiding behind. The gun was suppressed.The crew wheeled it away from the building as it was attracting fire.
The ATR engaged one of the T26s, hit it, but it bounced off. The Russian infantry were now filtering into the fields and the platoon CO managed to spot the firing ATR. The plan was to hand it off to the rest of the platoon next turn as a target.
The 2nd German platoon at least lined the stream/hedge and took up firing positions as the Russians in the woods began to fan out.
A bigger problem for the Germans was that having been wheeled into the open, the 75mm was no longer in cover. Three of the Russian tanks parked 500m away spotted the 75mm and blew it apart with several rounds of 45mm HE. Oh dear!
The Russians began advancing into the field and the ATR withdrew after being suppressed by massed fire from the enemy infantry. I can't see it escaping alive.
And firing broke out between the opposing platoons on the left.
At that point I called it. I can't see that the Germans have any answer to the massed suppressive fire that the Russians can generate with their armour. They can just pick a point and saturate it with fire, so a well earned Russian win, despite their earlier setback.
I felt much more on top of the spotting etc in that game, and I liked that way the armour-anti armour battle developed, but there is still an awful lot going on to generate a result. Modern games are much faster to produce similar effects. I also felt like I was playing the original WRG rules again, with all the drawbacks of those rules. I don't mind playing the 'stack up the negative reaction test modifiers' game - you need to suppress the enemy and attack them to force them back which is fine. But I do mind the silly gamey things you can do with area fire, and the way there is absolutely no differentiation between sides apart from a couple of national modifiers to morale, in fact you are better off with Russian or Japanese troops due to their morale bonuses. I guess that was something the later set tried address with its unit modes etc.
So that was quite a good exercise, I ended up playing the game rather than wrestling with mechanisms, and it was enough to remind me why I stopped playing WRG in the early 80s in favour of other things, but it was an entertaining exercise in nostalgia and many thanks to John for making the effort to write and publish these. Despite my grumbles there are lots of positives in this set of rules:
- The engagement ranges and the way engagements developed seemed far more in line with results from Operations Research than more abstract rules.
- I really liked the new anti-tank tables and the way armour penetration is handled.
- The new multi action moved/fire phases are also very clever indeed and work well, particularly differentiating between the way that vehicles and infantry operate.
- I actually felt like a company commander, writing (mental) orders, sorting out areas of responsibility, signals etc
I guess the downside is that there are a lot of mechanisms to get the end result, far fewer than Firefly or Cambrai to Sinai, but even so. The determinist spotting is integral to the way that combat works, so it can't be easily just taken out (effectively 'cover', barring proper protected positions, is factored into the acquisition roll, not the to hit roll) and it just results in so much dice rolling and stuff to remember. Too much for my old brain anyway.
I might, just might, go back and do an actual tank battle and see how that goes, but at the moment I think I'm a bit WRG'd out and I have some other things I need to do.